They love to tell you
Stay inside the lines
But something's better
On the other side
John Mayer - No Such Thing
Stay inside the lines
But something's better
On the other side
John Mayer - No Such Thing
Hey. Decided to go looking for wormholes huh? Couldn't or didn't get the test server going in time to get a handle on scan probing? Didn't understand it before and still don't? Want a quick reference guide instead of an entire video to find some specific information?
Yeah me either.
But given that I've already done it, I guess I might as well put this up:
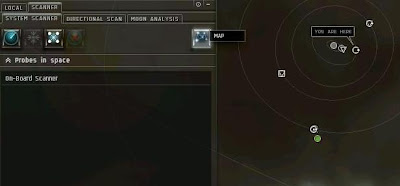
We can start by hitting the scanner button, that's circled in white. Once it's up, hit the map button. If you're playing in low-sec space, this is the point where you should be safed and cloaked.

This brings up the solar system map. Some of you have seen it before, some haven't. A small preview:

Go ahead and decloak, drop a probe, and recloak. I'll wait.

Wow, that bubble looks kinda cool doesn't it? If you're already in the center of a system, neat.
If not, you're going to want to know how to move the probe to the center. Here's a couple of helpful hints. Those little arrows on it? Yeah they're not just for show. Click it and drag it. If you hit shift while doing so you'll move all of the probes you have out in the same direction.
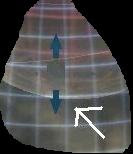
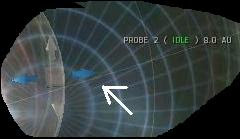 Now that you've got it in the center of the system, you'll notice it may not cover everything. You want to start at 32 AU and work your way down. You can resize by grabbing the outside of the bubble and dragging. If you have multiple probes out, holding shift while doing that will resize all of them to the same dimension.
Or you can resize a single probe by right clicking the probe in your scanner menu.

Once you cover the system properly in bubbles that don't touch each other, hit the Analyze button.

That starts a scan.

Your first hit on a signature will look like a bubble. Anomalies are usually so easy to find that at this point you've got their location already locked down.

That bubble means that the signature is from somewhere inside it. You'll want to shrink the size of your probe radius to get a more accurate reading. Notice that the anomolies already have 100% strength at this point.
 After you shrink the probe's size down you get a hit again, but the size of the hit is smaller. That's good.
Hmm. Lets try skipping 8 AU's and go straight to 4 AU's.
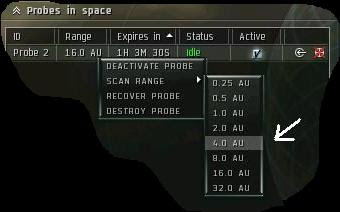
Bah, no signature hits at all. See the scanner results? Lets go back up to 8 AU's.
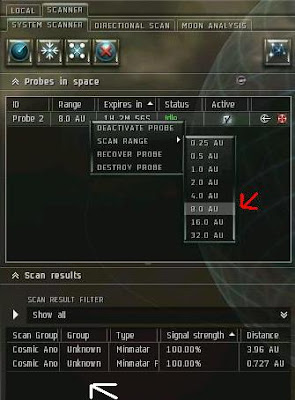
Ahh a hit again. So 8 AU's is as small as I can go. Time to start triangulating then. Drop 3 more probes.
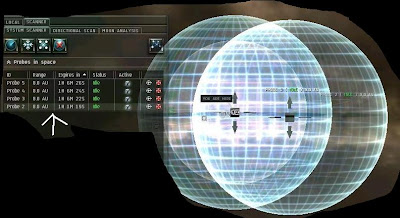
Once again, pay attention to their location in space. Move them using the arrows. Don't forget they are three dimensional, so you may or may not need to move them up or down as well.


Your probes should cover the bubble something like this:
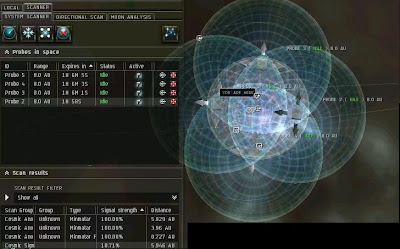
Ahh we've got the second stage of hits. It's a circle where two probes intersect. That means the location is somewhere on that circle. Move your probes again so that all four cover the space of that circle.
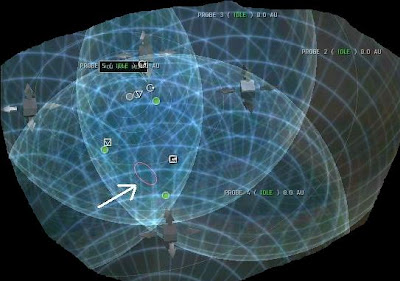
Before we scan again, take the time to create a filter that will ignore the anomolies. That way we can focus solely on this signature.
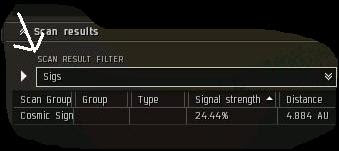
See how they dissapear from the map? Now we're ready to scan again.
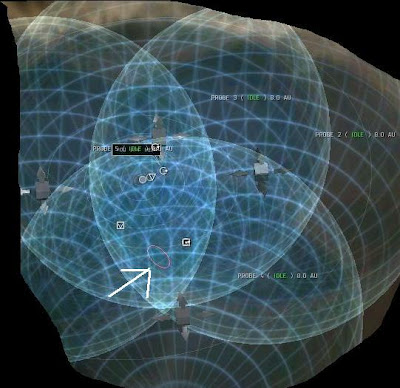
A point hit. Good. A point hit means 3 or more probes have a signal at that location. If it's only 3 probes, the location will be off by a fair amount. If you get two point hits very near each other, just treat it like a circle hit and cover both at the same time.
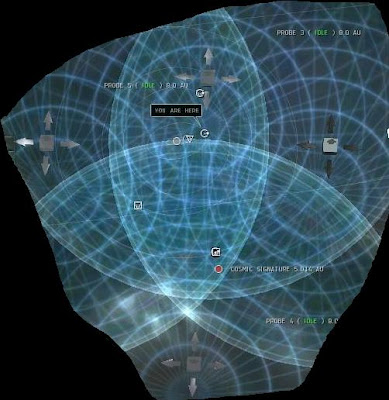 You only need 4 probes to get a location narrowed down, so lets resize our probe radius to 4 AU's and move all four to cover that point hit. Make sure that you take note of the hit's location on the plane of the solar system. In this case it's actually above my probes, so I'm going to click one of the arrows that move a single probe up and down, hold shift, and move all four at once.
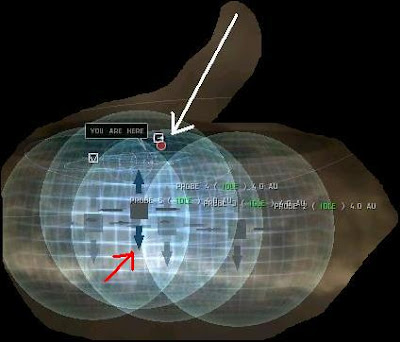 Once that's done, and the point is covered by probe radii, analyze again.
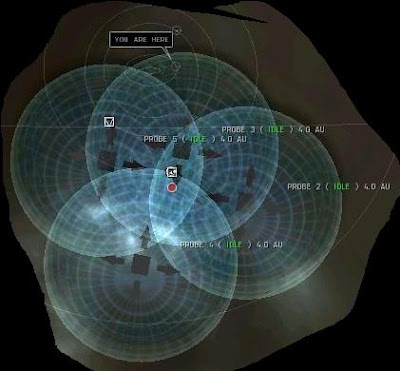
New hit, resize to 2 AU, and move the probes.
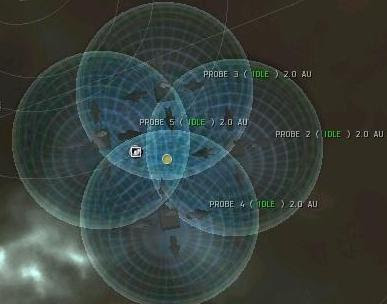 New hit, resize to 1 AU and move the probes.
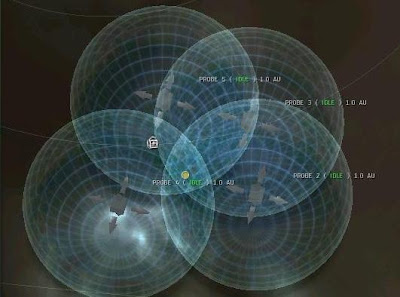
You're done. Signature found at 100% by four probes. If you're not done at this point, just keep resizing and moving the probes until you are done.
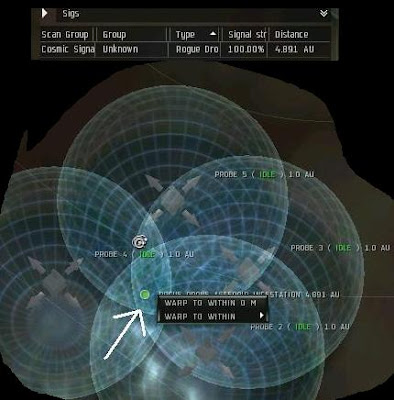
You can right click on the hit, and warp to it. Remember if you warp to a hit from the map, and once you get to where it should be it's not there, you've only got a hit with three probes. Just move them a bit and try again. Once you've arrived, bookmarked the location, and left, you can then recover your probes(truthfully you can do that any time you want).
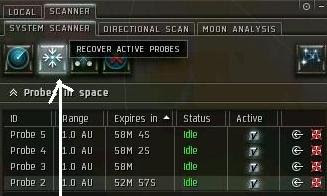
Hit the button and watch them return.
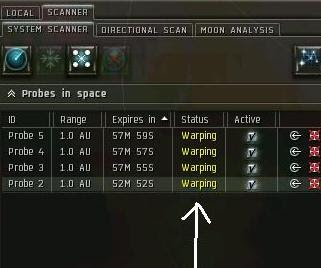
And you're done.
Pretty simple I think. Hope you find this useful.
Couple of closing comments. If you're having trouble positioning your probes, put them all on the same plane, and position the camera above them.
If you get down to .25 AU's and you still do not get a 100% hit, you're going to need to boost your scan strength. Get better skills, a covert ops ship, a sister's launcher, implants or move your probes closer to the hit. Or all five.
Most sites still spawn within 4 AU's of a celestial. CCP has said they can spawn outside of 4 AU's and I have confirmation from others that it is possible.
Please check this post for links to other material, should you need it.
If you have any questions, post a comment and I'll try to answer it, and add it to the guide if I can.
Good Day.

a sample arazu fit ?
ReplyDeletethanks.
Nice job, Hal. It definitely takes some practice to get a feel for the new mechanics but to those who are frustrated, I encourage you to stick with it. There came a moment for me when suddenly, it got quite intuitive and I "got it". Finding stuff went a lot faster then--especially if you take advantage of the filters feature to eliminate unwanted types of hits from the results list.
ReplyDeleteNice guide! I learned a couple things which I hadn't noticed yet. It should bring down my scanning times a little bit as I'm not very instinctive with the three-dimensional sort of thinking. Thanks!
ReplyDeleteVery nice guide on the new probing system!
ReplyDeleteI've been having a blast with it. Occasionally I find a signature that's elusive. I'll get down to 4AU with 4 probes, and then it'll disappear on my when I try to pin it down with probes set at 2AU. So, I have start over again (sort of).
Found a handful of mag & grav sites, plus a handful of wormholes. Very awesome activity in EVE.
I was playing with the system last night. One of the things it took me a while to realize is that you have to actually click on the result in the scan window for the red bubble/ring/sphere to appear. It may seem obvious to some, but it wasn't to me at the time.
ReplyDeleteThanks mate. This is brilliant. Have been fiddling around getting nowhere except through pure luck. With this guide it worked as a dream! Again, my thanks
ReplyDeleteSisters Core Probes help too.
ReplyDeleteAlso, a small note that i feel it should be added... Astrometric Pinpointing still has 10% less deviation. And for good reason. Sometimes i get 100% green, warp to 0, signal, but when i warp there, there is nothing. Sometimes rewarping in helps, but yeah. preferable to have it up to level 4 atleast.
Nice post! I guess I am still behind the curve today, but catching up fast, thank you.
ReplyDeleteOne question though -do we know how stuff spawns now? I seem to recall that things appeared within 4 AU of planets before Apocrypha; that made it easy to know what to cover and you could do with holes in your cover.
But today... do you know if stuff still spawns like that? Or do we have to look everywhere? (like, ships, which could be far away from anything?) I think that would change the scanning approach, mine at least, you should not have any holes then...
Things can spawn further than 4 AU's away, according to CCP. In my experience though, it's 4 AU's or under every time.
ReplyDeleteMy experience has been that I have found wormholes a little over 5 AU from planets before, but not farther then that.
ReplyDeletein my 6 days roaming w-space i have come to understand a little more from them. first off, if you start the system scan and get a 10% signature then work from that. this usually tends to bring up an unknown.. which in turn is most likely to be a wormhole. this is not always the case however. but in general work from 10% (or the nearest to it) out towards the higher or lower signals. secondly... i use 2 groups of 4 probes. one set at 8 au covering a planet or group of planets to get my rough signatures,deactivate them and activate the second set, these i use to refine a scan down to get a better signal. if the second comes up with nothing simply activate the first set and rescan, then move the second set to where the new scan is. it helps also if all skills are to 5.. i have 114 scan strength and have never missed a 100% when warping to it. hope this helps
ReplyDeleteRead this guide!
ReplyDeleteAfter reading Hallan's guide I lost 20 lb.s, married an Italian centerfold, won the lottery and got a 100% raise at work. All, in less than 24 hours of reading this guide.
I also found my first mission runner in 4 scan tries since Apocrypha.
Read this guide!! It will change your life!!
\o/ very well written, looking forward to try and get a hang of this once tranquility comes up again.
ReplyDelete/Franco, your Noir. brother in arms